What is Assembly?
Beginner’s guide to x86-64 Assembly with NASM. Learn registers, stack, syscalls, and why Assembly is essential for cybersecurity, reverse engineering, and exploit development
OS
assembly
reverse Engineer
Why Assembly ?
Most people have conflicting opinions about learning Assembly. They often ask: “Why learn Assembly when modern compilers can generate much better optimized code?”
It’s a fair question. Compilers today are incredibly smart. So why bother?
The simple answer is this, Assembly helps you see what the computer is actually doing. Compilers write the code, but Assembly reveals the truth behind it.
It makes debugging easier because you can understand the real machine instructions when optimized code looks confusing.
In cybersecurity , it’s even more valuable. Reverse engineering malware, analyzing binaries, and building exploits all depend on reading and writing Assembly.
Even if you rarely write it, learning Assembly removes the mystery of how programs really work.
The most important part? You mainly need to learn how to read Assembly, not how to write it perfectly. This skill alone makes debugging easier and unlocks reverse engineering.
What is NASM?
NASM, or the Netwide Assembler, is an 80x86 and x86-64 assembler designed for portability. It works by translating assembly language source files into machine-readable object files, which are then linked into executable programs.
NASM is chosen for educational purposes because it supports a wide range of output formats, allowing the same source code to be compiled for Windows, Linux, or macOS with minimal changes.
CPU Basics
Before we begin, we must learn the basics of the CPU. We will cover essential concepts such as: What are registers? What is the stack? What are flags? and much more.
Registers
A register is small, high-speed storage located directly inside the CPU. Unlike your computer RAM which are external to the CPU. Registers built into the hardware of the CPU itself. In NASM we can interact with these registers by name such as eax, ebx, rcx to perform every operation in the program.
Best understood through example
main.asm
1mov eax, 10
2mov ebx,20
3add eax, ebx
At the first line, we place the number 10 into the EAX register. On the second line, we place the number 20 into the EBX register. Finally, the third line adds the value in EBX to the value already in EAX. Because 10 plus 20 is 30, the EAX register now holds the final result of 30.
The Register size
When we talk about the size of a register we mean how much data it can hold at one time.
There have been a few generations of sizes:
- 8-bit (e.g., Intel 8080): Held 1 byte (e.g.,
0xFF). - 16-bit (e.g., Intel 8086): Held 2 bytes (e.g.,
0xFFFF). - 32-bit (e.g., Intel 80386): Held 4 bytes (e.g.,
0xFFFFFFFF). - 64-bit (Modern x86-64): Holds 8 bytes (e.g.,
0xFFFFFFFFFFFFFFFF).
The "Backward Compatibility" Trick:
Modern 64-bit CPUs are backward compatible. This means a 64-bit register (like RAX) can be partially used as a 32-bit (EAX), 16-bit (AX), or 8-bit (AL / AH) register. This is crucial for running older software.
For example, as we can see in the above image, we have the RAX register which is 64-bit (8 bytes). But here's the trick it's divided into smaller pieces, all sitting on the right side:
- RAX (64-bit) → The full register.
- EAX (32-bit) → The right half of RAX.
- AX (16-bit) → The right quarter of EAX.
- AL (8-bit) → The far-right byte of AX.
- AH (8-bit) → The byte just to the left of AL.
It is Important to note: If you modify EAX, the upper 32 bits of RAX get zeroed out. But if you modify AL, only that last byte changes—the rest of RAX stays untouched! So think of it like a variable.
The General-Purpose Registers (GPRs)
There are some of these registers you can use them for almost everything but historically they each have "favorite" job.
- Low bits = the least significant bits (rightmost bits, small values)
- High bits = the most significant bits (leftmost bits, large values)
Here is the master lists:
The Instruction Pointer (RIP / EIP)
RIP (or EIP in 32-bit) holds the memory address of the next instruction to be executed. The CPU automatically updates it after each instruction. You never write to it directly instead, you modify it using jump, call, and ret instructions (which we'll cover later).
The Stack Pointers (RBP and RSP)
RSP (Stack Pointer) points to the top of the stack. When you push data, RSP goes down; when you pop, it goes up. It automatically adjusts with push and pop instructions. We'll discuss the stack in detail later.
RBP (Base Pointer) acts as a fixed reference for the current function's stack frame. It helps you access local variables and parameters at consistent offsets. You'll often see it used with instructions like push rbp and mov rbp, rsp at the start of a function. We will dive deeper into the stack too.
Flags (RFLAGS / EFLAGS)
The flags register isn't like the other registers it does not hold single number. Instead it's a collection of boolean values called flags. these flags are automatically set or cleared by arithmetic and comparison operations let's see the most important ones you'll encounter.
CF (Carry Flag)
CF = 1 if an unsigned addition exceeds the maximum value that can fit in the register.
For example, AL (8-bits) can hold a maximum unsigned value of 255:
main.asm
1mov al, 100
2add al, 200
Here we place 100 in AL. On the second line, we add 200 to AL, which becomes 300. Since AL cannot hold 300, the CF flag will be set to 1.
PF (Parity Flag)
The Parity Flag is simple it just counts the number of 1s in the lowest 8 bits of the result.
- PF = 1 if there's an even number of 1s.
- PF = 0 if there's an odd number of 1s.
Important: PF only looks at the lowest 8 bits the rest of the register is ignored!
main.asm
1mov al, 5      ; AL = 00000101
2               ; Count the 1s: bits 0 and 2 are 1 → 2 ones
3               ; 2 is even → PF = 1
4
5add al, 0      ; AL stays 5, PF stays 1
First we set AL to have 5 value which if we convert to binary will look like this 00000101 as we can see we have 2 bits are set to 1 which are even so the PF flag is set to 1.
OF (Overflow Flag)
The Overflow Flag is used for signed arithmetic. It's set to 1 when a signed operation produces a result too big or too small to fit in the register.
Think of it like this: signed numbers have a range for 8-bit, that's -128 to +127. If you go beyond that, OF tells you something went wrong.
Example: Overflow!
main.asm
1mov al, 127
2add al, 1
Here we place 127 in AL, the maximum value for 8-bit signed integers. Adding 1 should give 128, but that's outside the signed range (-128 to +127). So AL wraps to -128, and the CPU sets OF = 1 to flag the signed overflow. CF = 0 since 128 fits in unsigned range, SF = 1 because the result is negative, and ZF = 0 since it's not zero.
ZF (Zero Flag)
ZF = 1 if the result of an operation is zero. ZF = 0 if the result is anything else.
main,asm
1mov al, 5
2sub al, 5
Here we place 5 in AL. On the next line, we subtract 5 from AL, which gives us 0. Since the result is zero, the CPU sets ZF = 1.
SF (Sign Flag)
SF = 1 if the result is negative. SF = 0 if the result is positive.
main.asm
1mov al, 10
2sub al, 20
Here we place 10 in AL. On the next line, we subtract 20 from AL, which gives us -10. Since the result is negative, the CPU sets SF = 1.
Stack
Stack is a region of memory that works like LIFO (Last in, First out). The CPU use the stack for storing return address when function is called, passing arguments to function, and storing local variables.
The Stack Grows Downward
Here's the tricky part: the stack grows downward in memory. This means when you add something to the stack, the stack pointer (RSP) moves to a lower memory address.
RSP points to the top of the stack. So when we push data, RSP decreases (moves down). When we pop data, RSP increases (moves up).
Example:
Let's say RSP starts at 0x1000
main.asm
1push rax
2push rbx
3
4pop rcx
5pop rdx - First line: We do
push rax. RSP starts at 0x1000, so it updates to 0x1000 - 8 = 0x0FF8. The value of RAX is stored at address 0x0FF8. - Second line: We do
push rbx. RSP is at 0x0FF8, so it updates to 0x0FF8 - 8 = 0x0FF0. The value of RBX is stored at address 0x0FF0. - Third line: We do
pop rcx. RSP is at 0x0FF0, so it loads the value from 0x0FF0 into RCX, then RSP updates to 0x0FF0 + 8 = 0x0FF8. - Fourth line: We do
pop rdx. RSP is at 0x0FF8, so it loads the value from 0x0FF8 into RDX, then RSP updates to 0x0FF8 + 8 = 0x1000 (back to where we started).
Function Call Mechanics
This is where the magic happens:
call instruction, it does two things:
- Pushes the return address (the address of the next instruction) onto the stack
- Jumps to the function
ret instruction, it does two things:
- Pops the return address off the stack
- Jumps to that address (puts it into RIP)
Example CALL and return
When first start the program, we start at 0x1000 address it will execute what ever and go to the next line which is in the RIP
Now we are in the line 0x2000 and will execute what ever in this address then go to next line base on RIP, notice how the RIP get automatically update to the next line
Now we are in line 0x3000 and in this line we hit `CALL` instruction which will do two things:
- push the next instruction to the stack, so the CPU will push the `RIP` value to stack
- jump to that function.
Now we are in my_function in line 0xA000 notice the RIP changed as well
By the CPU. we execute whatever in this address and go to next.
We hit the line 0xB000 we execute what ever and go to next
Now we are in line `0xC000` which have Ret instruction, it will do the following:
- it will pop the value from the stack in another word it will remove the value 0x4000 from the stack.
- change the current RIP with the value from the stack so RIP will change from
0xd000 to 0x4000 - jump back to the RIP address
After we pop the return value from the stack the execution flow return to normal.
Function Prologue and Epilogue
When a function is called, it needs to set up its own stack frame. This is done through the prologue (setup) and epilogue (cleanup).
Prologue (Function Setup)
At the start of a function, we save the current base pointer (RBP) and set it to the current stack pointer (RSP). This creates a fixed reference point for accessing local variables and parameters.
main.asm
1my_function:
2    push rbp
3    mov rbp, rsp
4    sub rsp, 32
5    ; ... function body ...
What's happening:
push rbp– Save the caller's RBP on the stack (so we can restore it later)mov rbp, rsp– Set RBP to point to the current stack top (our new frame base)sub rsp, 32– Reserve space for local variables (grow stack down)
Epilogue (Function Cleanup)
Before returning, we restore the stack and base pointer to their original state.
main.asm
1my_function:
2    push rbp
3    mov rbp, rsp
4    sub rsp, 32
5    ; ... function body ...
6    mov rsp, rbp    ; Restore RSP to where RBP is (deallocate locals)
7    pop rbp         ; Restore the caller's RBP
8    ret             ; Return to caller
What's happening:
mov rsp, rbp– Set RSP back to where RBP is (effectively deallocating local variables)pop rbp– Restore the caller's RBP from the stackret– Pop return address and jump back
We need the prologue and epilogue
RSP moves constantly as we push and pop data, making it hard to access local variables. RBP acts as a fixed reference point that stays constant during the function, so we can always access variables at predictable offsets like [rbp-8]. We also save the caller's RBP at the start and restore it at the end so we don't corrupt the caller's stack frame. This creates a chain that allows nested functions to return properly and helps debuggers trace the call stack.
Instructions You Must Know
There are tons of instructions you might encounter, but I'll explain the most common ones you'll see when disassembling programs or writing simple assembly code. For a full list, check out this.
Mov instruction
mov is the basic data-movement instruction. It copies data from a source to a destination. It does not do math, it does not change the source.
Syntax
mov destination,source
- Destination cannot be memory if source is memory
mov [rbx], [rcx]is invalid - Size of source and destination must match
mov eax, bl ; invalid: 32-bit ← 8-bit
Examples
code
1mov eax, 10
2mov eax,rax
3mov rax, [0x1000]
In last line, take the value stored at memory address 0x1000 and copy it into RAX. like dereference pointer in c or c++
Add/sub instruction
ADD and SUB are the basic arithmetic instructions in x86. I’ll explain with examples and comments for clarity.
Syntax
add destination, source
this mean destination = destination + source
destinationcan be a register or memory.sourcecan be a register, memory, or immediate (constant).- The CPU updates flags:
- CF = carry (unsigned overflow)
- OF = overflow (signed overflow)
- ZF = zero flag
- SF = sign flag
- PF = parity
The same rules for sub
LEA Instruction
LEA (Load Effective Address) calculates an address and stores it in a register. It does NOT access memory it just does the math.
Syntax
lea destination, source
This means destination = address calculated from source.
- Destination must be a register.
- Source is a memory operand (with brackets).
- does not effect flags.
Examples:
main.asm
1lea rax, [rbx+8]    ; RAX = RBX + 8 (just math, no memory access)
2lea rax, [rbx+rcx*4] ; RAX = RBX + RCX * 4 (array indexing)
3lea rax, [rip+10]   ; RAX = RIP + 10 (position-independent addressing)
mov will copy the actual value from memory or register to the destination. lea just calculates the address it doesn't access memory at all.
XOR Instruction
XOR performs a bitwise exclusive OR operation. It's very important in shellcode because it can zero registers without creating null bytes.
Syntax
xor destination, source
This means destination = destination ^ source (bitwise XOR).
- Destination can be a register or memory.
- Source can be a register, memory, or immediate.
Flags affected:
- ZF = 1 if result is zero
- SF = 1 if result is negative
- PF = 1 if even number of 1s in low byte
- CF = 0 (always cleared)
- OF = 0 (always cleared)
Examples
main.asm
1xor rax, rax  ; RAX = 0 (clears register, no null bytes!)
2xor rbx, 0xFF ; Flip the lowest 8 bits of RBX
3xor rax, rcx  ; RAX = RAX ^ RCX
TEST Instruction
TEST performs a bitwise AND between two operands but does NOT store the result. It only sets flags.
Syntax
test operand1, operand2
This means operand1 & operand2 (bitwise AND) but the result is discarded.
Flags affected:
- ZF = 1 if result is zero
- SF = 1 if result is negative
- PF = 1 if even number of 1s in low byte
- CF = 0 (always cleared)
- OF = 0 (always cleared)
Examples:
mian.asm
1test rax, rax  ; Check if RAX is zero
2jz  zero_label ; Jump if RAX == 0
3
4test rax, 0x01 ; Check if bit 0 is set
5jnz bit_set    ; Jump if bit 0 = 1
6
7test rax, rbx  ; Check if RAX & RBX is zero
8jz zero_result ; Jump if no common bits
CMP Instruction
CMP compares two values by subtracting them behind the scenes. It sets flags but doesn't store the result.
Syntax
cmp operand1, operand2
This means operand1 - operand2 (subtraction) but the result is discarded. Operands are unchanged.
- Both operands must be the same size.
- Can compare register, memory, or immediate.
Flags affected:
- ZF = 1 if operands are equal
- SF = 1 if result is negative (operand1 < operand2 signed)
- CF = 1 if unsigned borrow (operand1 < operand2 unsigned)
- OF = 1 if signed overflow
- PF = Parity flag
Examples:
main.asm
1cmp rax, 10         ; Compare RAX with 10
2cmp rax, rbx        ; Compare RAX with RBX
3cmp [rsp], 5        ; Compare value at RSP with 5cmp rax, 10         ; Compare RAX .asmwith 10
4cmp rax, rbx        ; Compare RAX with RBX
5cmp [rsp], 5        ; Compare value at RSP with 5
JMP Instruction
JMP is the unconditional jump instruction. It transfers control to another location in the program.
Syntax
jmp destination
This means RIP = destination (jump to that address).
- Destination can be a label or memory address.
Flags affected: None.
Examples:
main.asm
1jmp loop_start ; Jump to loop_start label
2jmp 0x00401000 ; Jump to specific memory address
3jmp [rsp] ; Jump to address stored at RSP
Conditional Jumps (JCC)
Conditional jumps check flags (set by CMP or TEST) and jump if the condition is true.
Syntax
main.asm
1je destination     ; Jump if equal
2jne destination    ; Jump if not equal
3jg destination     ; Jump if greater (signed)
4jl destination     ; Jump if less (signed)
5jge destination    ; Jump if greater or equal (signed)
6jle destination    ; Jump if less or equal (signed)
7ja destination     ; Jump if above (unsigned)
8jb destination     ; Jump if below (unsigned)
9jae destination    ; Jump if above or equal (unsigned)
10jbe destination    ; Jump if below or equal (unsigned)
Common JCC instructions:
x64 Calling Convention
When writing functions in x64 assembly, you need to follow specific rules so your code works correctly with other functions (and with C/C++ code). This is called the calling convention.
A calling convention is a set of rules that defines:
- Where arguments are passed (registers or stack)
- Who cleans up the stack (caller or callee)
- Which registers must be preserved
Functions arguments
Linux (System V AMD64 ABI)
When you call a function in Linux x86-64, arguments are passed using specific registers. The first argument goes into RDI, the second into RSI, the third into RDX, the fourth into RCX, the fifth into R8, and the sixth into R9. Any additional arguments beyond the sixth are passed on the stack in right-to-left order. This calling convention is designed to minimize memory access and keep most function parameters in fast CPU registers.
Windows (Microsoft x64 ABI)
On Windows x86-64, the calling convention is different. The first argument is placed in RCX, the second in RDX, the third in R8, and the fourth in R9. If there are more arguments, they are passed on the stack in right-to-left order. The caller must always reserve 32 bytes of shadow space on the stack before making a function call, even if fewer arguments are used. This space is used by the callee for register spilling and maintains a consistent calling environment.
Example:
main.asm
1sub rsp, 32             ; reserve shadow space (REQUIRED!)
2mov rcx, 5              ; arg 1
3mov rdx, 10             ; arg 2
4mov r8, 15              ; arg 3
5mov r9, 20              ; arg 4
6mov [rsp + 32], 25      ; arg 5 (stack, after shadow space)
7call my_function
8add rsp, 32             ; clean up shadow space
Before call function you must put arguments in the correct register before calling. for both windows and linux.
Return Value (Callee's Job)
the function returns a value in RAX for example:
main.asm
1my_function:
2    mov rax, 42
3    ret
When the caller executes call my_function, the function runs and places the value 42 in RAX. After ret returns control to the caller, the caller can access the result in RAX.
Note For system calls we put the syscall number in RAX register we will see it later.
Preserved vs Scratch Registers
This is the most important part! Some registers must be preserved, others can be freely modified.
Preserved Registers (Callee Save) , RBP, RBX and R12-R15. If you modify these registers you MUST save them at the start and restore them before returning from the function.
Scratch Registers (Caller Saved): RAX,RCX,RDX,RSI,RDI,R8-11,RSP. you can modify these as you want without saving them. the caller knows they may by changed.
Stack Alignment
The stack must be 16-byte aligned before a call instruction. This means RSP must be a multiple of 16. Why? Some SSE/AVX instructions require 16-byte alignment. Before you call a function, make sure that is true. just make sure Before calling a function, ensure you've done an EVEN number of pushes (or equivalent sub rsp, 8n).
Syscalls (Linux focus)
Syscalls are how your program communicates with the operating system kernel. When you need to read a file, write to the console, or exit your program, you use a syscall.
Before a syscall executes, place:
- RAX – The syscall number (which operation you want)
- RDI – First argument
- RSI – Second argument
- RDX – Third argument
- R9 – Fourth argument (rarely used)
Then execute syscall instruction. The kernel runs the operation and returns the result in the RCX.
Common Syscall Numbers (x86-64 Linux)
- 0 – read (read from file descriptor)
- 1 – write (write to file descriptor)
- 2 – open (open a file)
- 3 – close (close a file descriptor)
- 60 – exit (exit the program)
- 9 – mmap (map memory)
- 57 – fork (create new process)
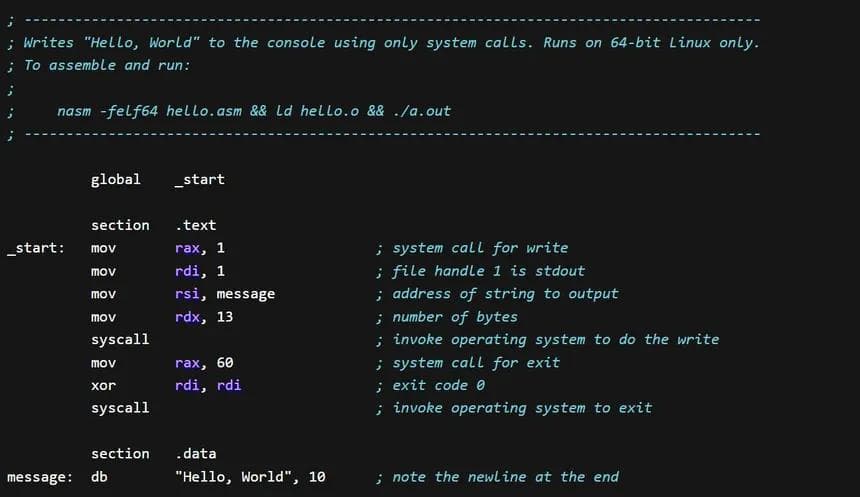
Let's see an example:
main.asm
1section .data
2    msg: db "Hello, World!", 10   ; 10 = newline character
3    len: equ $ - msg               ; Calculate length (13 bytes)
4
5section .text
6    global _start
7
8_start:
9    ; Write "Hello, World!" to console
10    mov rax, 1          ; write syscall
11    mov rdi, 1          ; stdout (console)
12    mov rsi, msg        ; address of the message
13    mov rdx, len        ; length of the message
14    syscall             ; kernel writes to console
15
16    ; Exit with code 0
17    mov rax, 60         ; exit syscall
18    mov rdi, 0          ; success (0)
19    syscall             ; kernel exits program
First, the program places 1 in RAX (write syscall), 1 in RDI (stdout), the address of msg in RSI, and the length in RDX. When syscall executes, the kernel writes "Hello, World!" to the console. Then the program places 60 in RAX (exit syscall) and 0 in RDI (success code). The second syscall terminates the program.
NASM Sections
In NASM assembly, the program is divided into sections. Each section tells the assembler and linker where to place different parts of your code and data in the final executable.
.data Section - Initialized Data
This section used for Initialized data have read/write permissions.
main.asm
1section .data
2    msg db "Hello, World!", 10   ; String with newline
3    len equ $ - msg              ; Calculate length (constant)
4    num dq 42                    ; 64-bit number
5    array dd 1, 2, 3, 4, 5       ; Array of 32-bit integers
6    flag db 1                    ; Single byte (true/false)
7    pi dq 3.14159                ; Floating point number
Directives in .data:
db– Define Byte (1 byte)dw– Define Word (2 bytes)dd– Define Double Word (4 bytes)dq– Define Quad Word (8 bytes)dt– Define Ten bytes (10 bytes)equ– Define a constant (no memory allocated)
.bss Section – Uninitialized Data
This section reserves space for variables that will be set at runtime. The linker initializes this section to zeros. have read/write permissions
Usage: Buffers, input storage, temporary data.
main.asm
1section .bss
2    buffer resb 64               ; Reserve 64 bytes
3    input resq 10                ; Reserve 10 quad words (80 bytes)
4    temp resd 1                  ; Reserve 1 double word (4 bytes)
5 big_buffer resb 4096 ; Reserve 4KB bufferresb– Reserve Byte (1 byte)resw– Reserve Word (2 bytes)resd– Reserve Double Word (4 bytes)resq– Reserve Quad Word (8 bytes)rest– Reserve Ten bytes (10 bytes)
.text Section – Executable Code
This section contains the actual machine code instructions. It's marked as read-only and executable.
Usage: Your program code.
main.asm
1section .text
2    global _start                ; Make _start visible to linker
3
4_start:
5    ; Your code here
6    mov rax, 60
7    mov rdi, 0
8    syscall
.rodata Section – Read-Only Data
The .rodata section stores read-only data—constants that your program can read but never modify.
Usage: Strings, constant values, lookup tables, format strings.
main.asm
1section .rodata
2    greeting: db "Hello, World!", 0   ; String with null terminator
3    pi: dq 3.14159                     ; Constant floating point
4    hex_values: db "0123456789ABCDEF"  ; Lookup table
5    format: db "Value: %d", 10, 0      ; Format string for printf
How to Compile and Run NASM Code (Linux)
To actually run the assembly code examples, you need to compile them. Here's how to do it on Linux.
Step 1: Install Required Tools
First, make sure you have NASM (the assembler) and ld (the linker) installed:
sudo apt install nasm binutil this install both tools you need.
Step 2: Assemble the Code
The assembler converts your assembly code into machine code (object file):
nasm -f elf64 add.asm -o add.o the -f elf64 output format for 64-bit linux. and the add.asm source file, and -o add.o output object file.
Step 3: Link the Code
If you have a standalone program like Example 5 (syscall), link it:
ld add.o -o add This creates an executable file called add and you can just run it!
Code examples
Add Two number and return result
main.asm
1section .text
2    global add_numbers
3
4; int add_numbers(int a, int b)
5; Parameters: rdi = a, rsi = b
6; Return: rax
7add_numbers:
8    mov rax, rdi        ; rax = a
9    add rax, rsi        ; rax = rax + b
10 retCompare Two Numbers and Return Larger
main.asm
1section .text
2  global get_max
3
4; int get_max(int a, int b)
5; Parameters: rdi = a, rsi = b
6; Return: rax (the larger value)
7get_max:
8    mov rax, rdi        ; rax = a
9    cmp rax, rsi        ; compare a with b
10    jge skip             ; if a >= b, skip the next line
11    mov rax, rsi        ; rax = b (if b is larger)
12skip:
13 retCount from 1 to N (Loop)
main.asm
1section .text
2    global count_to_n
3
4; void count_to_n(int n)
5; Parameter: rdi = n (how high to count)
6; This function prints numbers 1 to n using a loop
7count_to_n:
8    push rbp
9    mov rbp, rsp
10    sub rsp, 8          ; align stack
11
12    mov rax, 1          ; rax = counter (starts at 1)
13
14loop_start:
15    cmp rax, rdi        ; compare counter with n
16    jg loop_end         ; if counter > n, exit loop
17
18    ; Print rax (the current number)
19    mov rsi, rax        ; convert rax to string... (simplified)
20
21    add rax, 1          ; increment counter
22    jmp loop_start      ; jump back to loop_start
23
24loop_end:
25    add rsp, 8
26    pop rbp
27 retSave and Restore Preserved Registers
main.asm
1section .text
2    global use_rbx_and_rbp
3
4; void use_rbx_and_rbp(int a)
5; Parameter: rdi = a
6; This function modifies RBX and RBP (preserved registers)
7use_rbx_and_rbp:
8    push rbp            ; SAVE RBP (preserved, must save!)
9    mov rbp, rsp
10    push rbx            ; SAVE RBX (preserved, must save!)
11
12    ; Now we can use RBP and RBX freely
13    mov rax, rdi        ; rax = parameter
14    mov rbx, 10         ; rbx = 10 (we modified rbx, so we saved it)
15    imul rax, rbx       ; rax = rax * rbx
16
17    ; Clean up before returning
18    pop rbx             ; RESTORE RBX
19    pop rbp             ; RESTORE RBP
20 retSimple Syscall - Print to Screen
system_call.asm
1section .data
2    msg db "Hello, Assembly!", 0
3    msg_len equ $ - msg
4
5section .text
6    global _start
7
8_start:
9    ; write(1, msg, msg_len)
10    mov rax, 1          ; syscall 1 = write
11    mov rdi, 1          ; fd = 1 (stdout)
12    mov rsi, msg        ; buffer = msg address
13    mov rdx, msg_len    ; count = msg_len
14    syscall             ; execute syscall
15
16    ; exit(0)
17    mov rax, 60         ; syscall 60 = exit
18    mov rdi, 0          ; exit code = 0
19 syscall ; execute syscallWhat next?
This was a brief explanation of how assembly works and the basics you need to know. If you're interested in learning more and diving deeper into assembly programming, here are some great resources, the best one is the art of assembly book, you have also Felix Cloutier's x86 Reference. Good luck!
Published 1 day ago